“This one is also available,” Javier, the developer, said as he walked us out onto Parcela 25. Felipe and I stopped to take it all in, turned to each other, and smiled. The space, I thought. The gorgeous, open space.
We had been renting a 350-square-foot house (technically a so-called “tiny house” by definition) for nearly a year, and we were over it. We enjoyed living in the small town of La Unión in the Los Rios region of southern Chile, but the tiny house was no longer working for the lifestyle we wanted.
Parcela 25 would bring the change we needed.
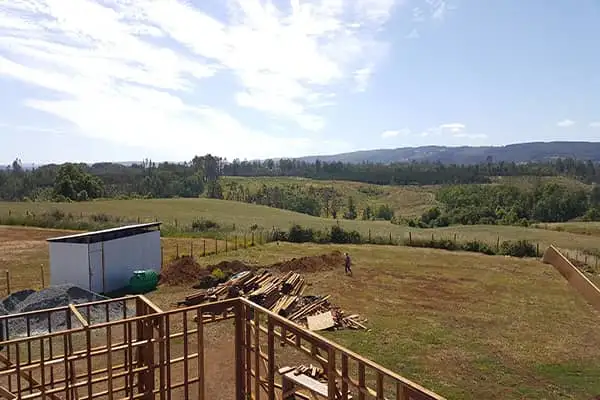
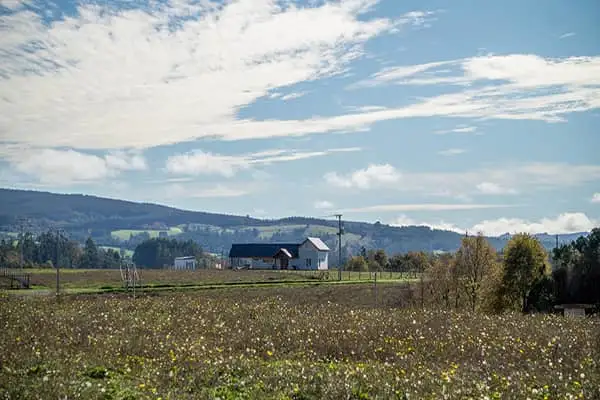
Occupying the sloping crest of a low hill and looking out onto the Oncol Mountains in the west and a series of three Andean volcanoes to the east, it had the views, the peace, and the space we were craving after a year crammed into our tiny house.
The ins and outs of buying land in a foreign country are complex, and Chile is no exception. It took us almost three months of signing papers, consulting lawyers, visiting the corresponding government offices, and transferring money here and there before the land was officially under our name. But finally, in August of 2019, we stepped onto our land to envision the house we would soon build.
Deciding to Stay in Chile
Coming from a hectic life in the U.S., I was ready to try out a slower pace. When I met my partner during a stint as a volunteer English teacher in La Unión, the decision to return to the U.S. or stay in Chile wasn’t a difficult one to make. Life in the U.S. would mean more years of paying rent while saving up money to buy or build a house. The red tape would seem endless. And the life we would end up with would likely require more work hours, more stress, and less space to call our own.
Chile would provide us the chance to keep things simple and grow into life as we got older while avoiding soul-crushing levels of debt. Building a house in La Unión would mean more organization was needed on our end but would ultimately come with a price tag that would be at least half of that in the U.S. Our house could be the average size of a smaller home in the U.S. and still feel big by Chilean standards. And the land would offer us the space to realize our dream projects of creating a self-sustaining garden, building a music studio for my partner’s endless instruments, and adding on to our house should the need ever arise.
Preparing to Build
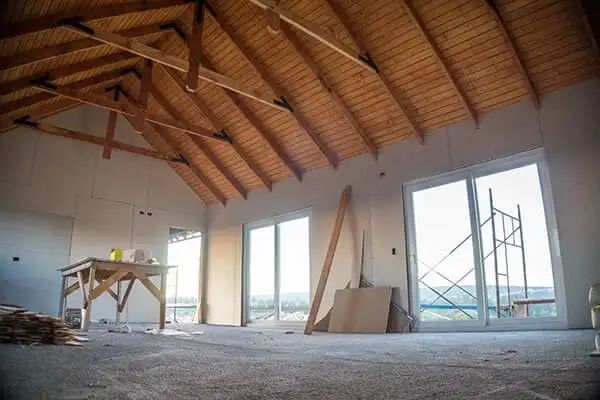
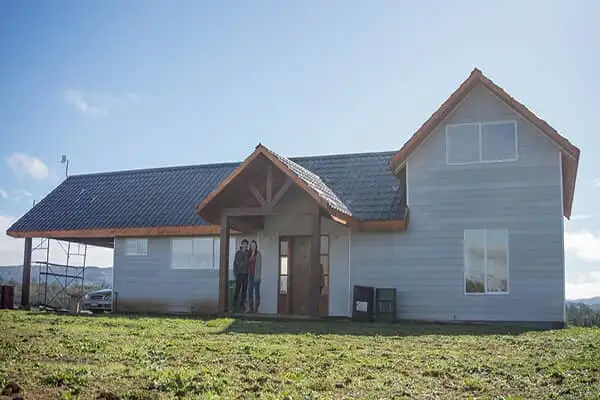
I designed our house myself. After hours scrolling through Pinterest, measuring out floor plans, and creating 3D videos to visualize layouts, we had an open-concept floor plan with a separate bedroom, bathroom, and office, as well as an open garage. A planned second floor would have the bones built in but none of the finishing work, including stairs—this could all come later.
Without the need for an architect, we got in touch with a former government employee who knew the ins and outs of mapping out the design in AutoCAD, and he was able to create all of the paperwork that we would need in order to register our house in the local municipality.
This is a vital step for anyone building a house in Chile. In order to be legally registered and under the not-so-watchful eye of the local tax office, the house needs to have all the necessary paperwork. The easiest way to move forward at this point would be to find a registered architect. This will be more expensive than the route we took, but they’ll make sure everything is squared away before you move on to consulting the municipality for the next steps.
Next came more municipality runs, visits to the government office overseeing the city water systems, registering the house in the local real estate office, and finally receiving the official green light to get started on the build.
If you’ve chosen Chile as the location for your next home, you’ve likely already grown fond of the slower pace of life here. Keep in mind that that applies to almost every aspect of daily happenings, so don’t expect anything to move quickly, especially any process that involves local governments. If you’re willing to tap into some patience and a sense of excitement, the pre-build hurdles will seem like little more than minor inconveniences.
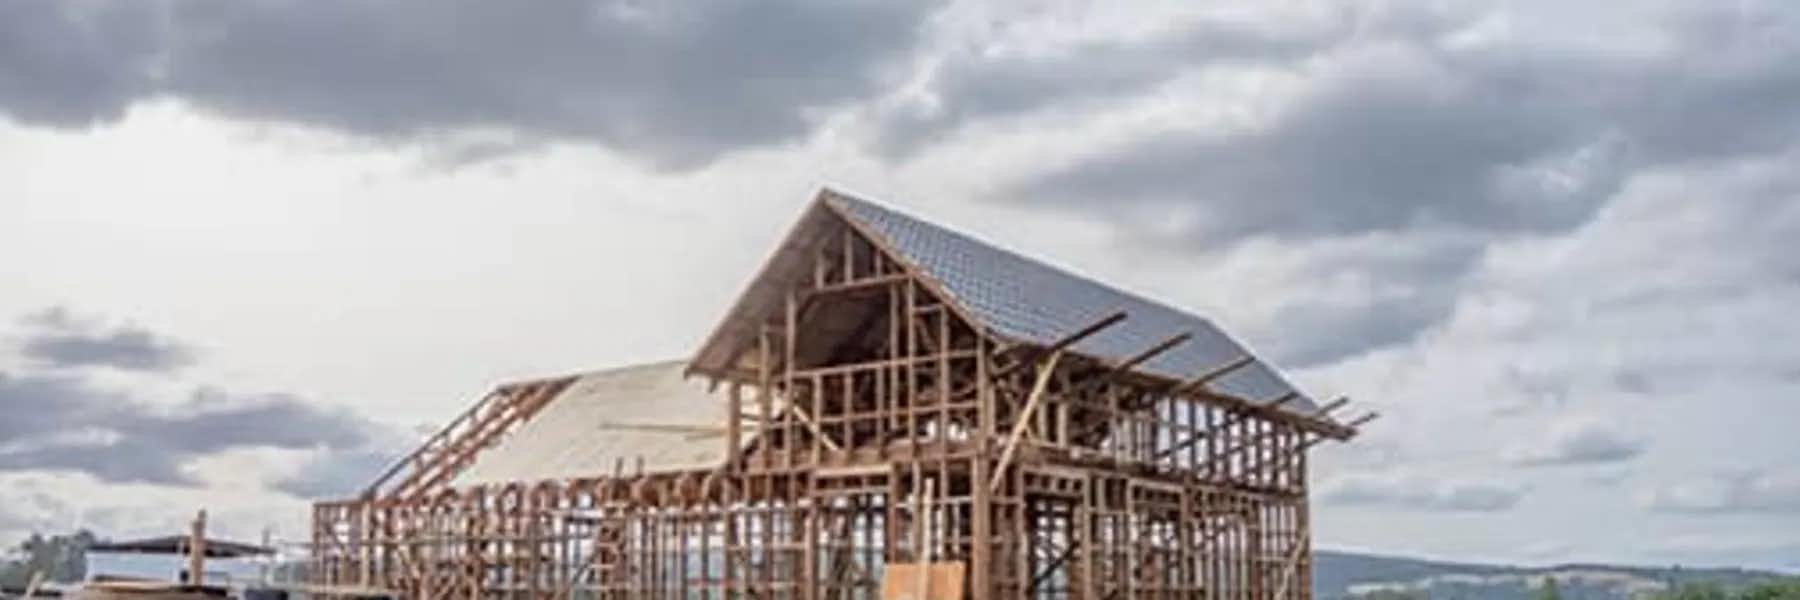
The Build
One of the most important decisions of the entire process was deciding whether to hire a maestro or a registered construction company. A maestro—essentially a freelance construction worker—often has years of experience and doesn’t make you sign any contract, which lets you avoid the dreaded IVA, the 19% tax that gets slapped on almost any product or service you can think of. When you’re talking about the thousands of dollars you’re already investing in a house build, that 19% IVA will likely cause some slight nausea when you see it written on a contract.
We chose to use a maestro, as we knew a family friend who worked as one and felt confident we could trust him without the legal fallback of a contract. However, if you are a foreigner with few connections here in Chile, a maestro may not be the way to go. You would be in charge of acting as the contractor and sourcing materials, and you would have no recourse should things go south.
A registered construction company will come with the IVA, but the price you see on the contract is the price you get (whereas maestros may mysteriously “lose” materials, forcing you to buy them a second time), and they will also take care of sourcing all materials. Furthermore, registered companies are legally bound to fix any mistakes they make during the build.
Overall, our decision served us well. Our maestro had more than 20 years of experience under his belt, and our 1,200-square-foot house likely felt like a tiny house project to him. He was flexible with the few small changes that we—okay, okay, that I—decided to make throughout the build and knew where to find the cheapest and best quality materials to keep our budget as low as possible. While much of our free time was occupied by collecting quotes, sourcing and moving materials, and finding transport to haul larger loads, we were able to really make things our own throughout the entire process.
With that said, our budget was unrealistic from the beginning. I had read that, when acting as your own contractor, you should add 30% to however much you think it will cost, and that’s how much it will likely be. This seemed dramatic during my research, but I can now say with confidence that the 30% rule is more or less correct, because you simply can’t account for every little thing you will need to buy throughout the build. The maestro will only tell you his labor costs per square meter (remember, Chile uses the metric system), and while they will be able to estimate the potential costs of materials, nothing is set in stone.
Those coming from most developed countries may wonder when the house inspections will happen. The answer is that they probably won’t. While the city is legally allowed to complete an inspection of the build, they are often too busy with other things to allocate time to this tedious task. Of course, this varies by city, and if you’re building closer to a city center, expect more red tape than if you decide to build in the country or a small town.
Also, it’s important to ask about building limitations (we didn’t know to ask this, and it caused quite a few headaches later). While building “codes” aren’t much of a thing in Chile, private parcelaciones or condominios often come with internal regulations that dictate where, when, and how you can build. Our condo’s internal regulations, for example, stated that we would have to build a house with at least 110 square meters, we couldn’t build within four meters of any fence, and our entrance gate had to be set at least two meters in from the road, among many other things. Most internal regulations aren’t as strict, but make sure you read the fine print before signing any contract, or you may find yourself with a piece of land that will limit or completely demolish your vision.
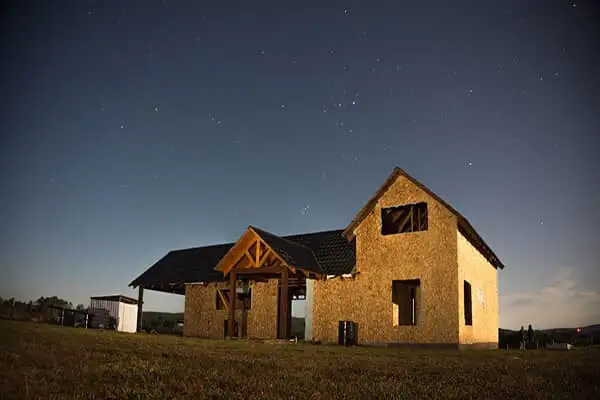
Our house took about four and a half months to build, but it can often take longer if you decide to build during the winter months (June-August), as rain will inevitably cause delays. The best time to get started would be in September or October, as the build will almost certainly be done before the winter rains set in the following year.
Keeping it Green
My partner and I had a limited budget, but we knew that we wanted to make sustainability a priority. We had the good fortune to buy a plot of land with access to water and electricity (if you’re looking at land in the countryside, this should also be among the first questions you ask). While we took advantage of connecting to the installed pump and well water system, we decided to forego direct access to electricity and instead installed an off-grid 5Kw solar panel system, which, in 2019, cost us around CLP$6,000,000 with IVA (approx. USD$7,500).
While we are incredibly happy with our decision, especially after more than a year of not paying an electric bill, this was one of the most stressful parts of the entire build. The builders had to use a generator until the roof was complete and the panels installed, and the gas to fuel the generator was an extra cost we hadn’t originally factored in. Furthermore, the local company we chose to do the installation was notoriously slow and evasive with their answers about when materials would arrive.
Despite the challenges of getting it installed, the solar panel system is now one of the shining features of our house. During our first year with the system, we did lose battery life two or three times, but this was mostly because we were still adjusting to the amount of electricity we could use on a given day depending on the weather. We have four batteries that offer a reserve of four or five days of electricity, but here in southern Chile, you can have a full week or more of cloud cover and rain during the winter. We’ve had to adjust our expectations and our routines to match that of the sun, but this has taught us how to work with nature instead of against it—a lesson we’re more than grateful for.
The Final Cost
In the end, the entire build cost us around USD$70,000. This includes the cost of a half hectare of land (around USD$25,000), the pre-build legalities, and the materials and labor costs of the build.
We were able to save a good chunk of money by using wood harvested from my partner’s grandma’s land. She graciously allowed us to fell a huge laurel tree that provided nearly all of the lumber we needed, and the only additional costs were for the labor needed to process the tree and the transport. The money we saved is what allowed us to invest in solar panels. We also splurged on our double-pane windows to help insulate the house (good insultation is key in the south). While the most common form of heating here is the traditional wood-burning stove, we chose to go with a pellet stove for convenience, to limit electricity use, and to help anti-pollution efforts here in the south.
If you are looking to retire in southern Chile, a smaller piece of land, as well as a smaller house, will, of course, lower costs even more. Either way, the house of your dreams will likely cost a fraction of what it would in the U.S.
Lessons Learned
Life in southern Chile has taught me to take moments to notice the little beauties in everyday life: the constant rainbows that peek out when the sun and rain collide in early spring; the soft caw of the owl that visits our land each evening, scanning for mice; the way the baby quail wiggle behind their mother as they keep close to the row of blackberry bushes lining our back fence; the moment a full moon peeks over the Andes on a warm summer night. With that said, learning to slow down and take things as they come was a hard lesson to learn. I had to put aside my constant need for control and allow things to happen in their own time.
A house build in Chile tested my limited patience, as a house build in any part of the world would. Modern conveniences found in the U.S. or Europe are scarce here, and if you do find them, they’re expensive to both buy and install. However, I decided I was willing to embrace a simpler lifestyle and take a step back from unnecessary luxuries, finding that, in the end, this meant time opened itself up and allowed me to take in each moment of life with greater awareness and peace of mind.
Related Articles
The World’s Best Places to Retire